
Advent calendars are a family tradition in our house for the Christmas season. My kids absolutely adore them and look forward to opening each day’s surprise. We’ve tried all types of advent calendars, but this year I’m going to make my own. I know, it sounds daunting but hear me out. I’m going to make a Christmas tree shaped advent calendar using empty toilet paper rolls. I usually save empty toilet paper rolls to use for fun crafts with my kids. So, I already had a huge stash to use to make my advent calendar. However, if you don’t have a big stash of empty toilet paper rolls like me. Then you could start collecting some now or just switch them out for those miniature solo cups or paper cups. Below is a step by step tutorial on how to make the Christmas tree shaped advent calendar and a free printable to use to label the advent calendar.
Disclaimer: This post contains affiliate links. That means that if a purchase is made from our recommended products, then we may receive a small commission.
Supplies needed to make an advent calendar:
- Sheet of cardboard
- 24 empty toilet paper rolls (or 12 because you could cut them in half to get 24 more shallow rolls) – If you dont have loads of empty toilet paper rolls, then you could use miniature solo cups or those party paper cups.
- Hot glue gun – I’ve linked a pretty awesome cordless hot glue gun here.
- Small rubber bands or elastic hair ties – I used elastic hair ties that I already had on hand and have linked here for you.
- Small candy and toys – I used a bunch of left over Halloween candy and leftover goodie bag toys that I had stashed away from past birthday parties. I had things like punch balloons, spinning tops, lip glosses, etc. I’ve linked a pretty awesome Christmas variety pack of goody bag stuffers that would be perfect for this.
- Free printable advent calendar labels – you can print these free labels off from the link that’s in our tutorial below
- Glue stick
- Optional: Free printable family bonding Christmas activities sheet – this is another free printable that we offer on our blog. It’s a sheet filled with 25 different family bonding Christmas activity squares that you can cut out and add to any advent calendar. I’ve linked our blog post that has the free printable right below.
How to make an advent calendar
1. First collect all your empty toilet paper rolls and arrange them into a Christmas tree shape on your piece of cardboard. This will help you visual how it will look and so you can tweak the shape to your liking.
2. Hot glue one end of each toilet paper roll and attach it to the cardboard sheet.


3. Continue this processes until all of the empty toilet paper rolls are glued onto the cardboard sheet in the shape of a Christmas tree. See the image below for reference.

4. Fill each tube with whatever surprise you’d like. I added candy to some tubes, toys to other tubes and a family bonding activity from my free printable that’s linked above in the supplies section. I added one family bonding activity to ALL of the tubes.


5. Next cut the green tissue paper into 24 squares that are about 2 inches by 2 inches.
6. Cover each open toilet paper end with one tissue paper square and use a rubber band to wrap the tissue paper around the tube. See the picture below for reference.

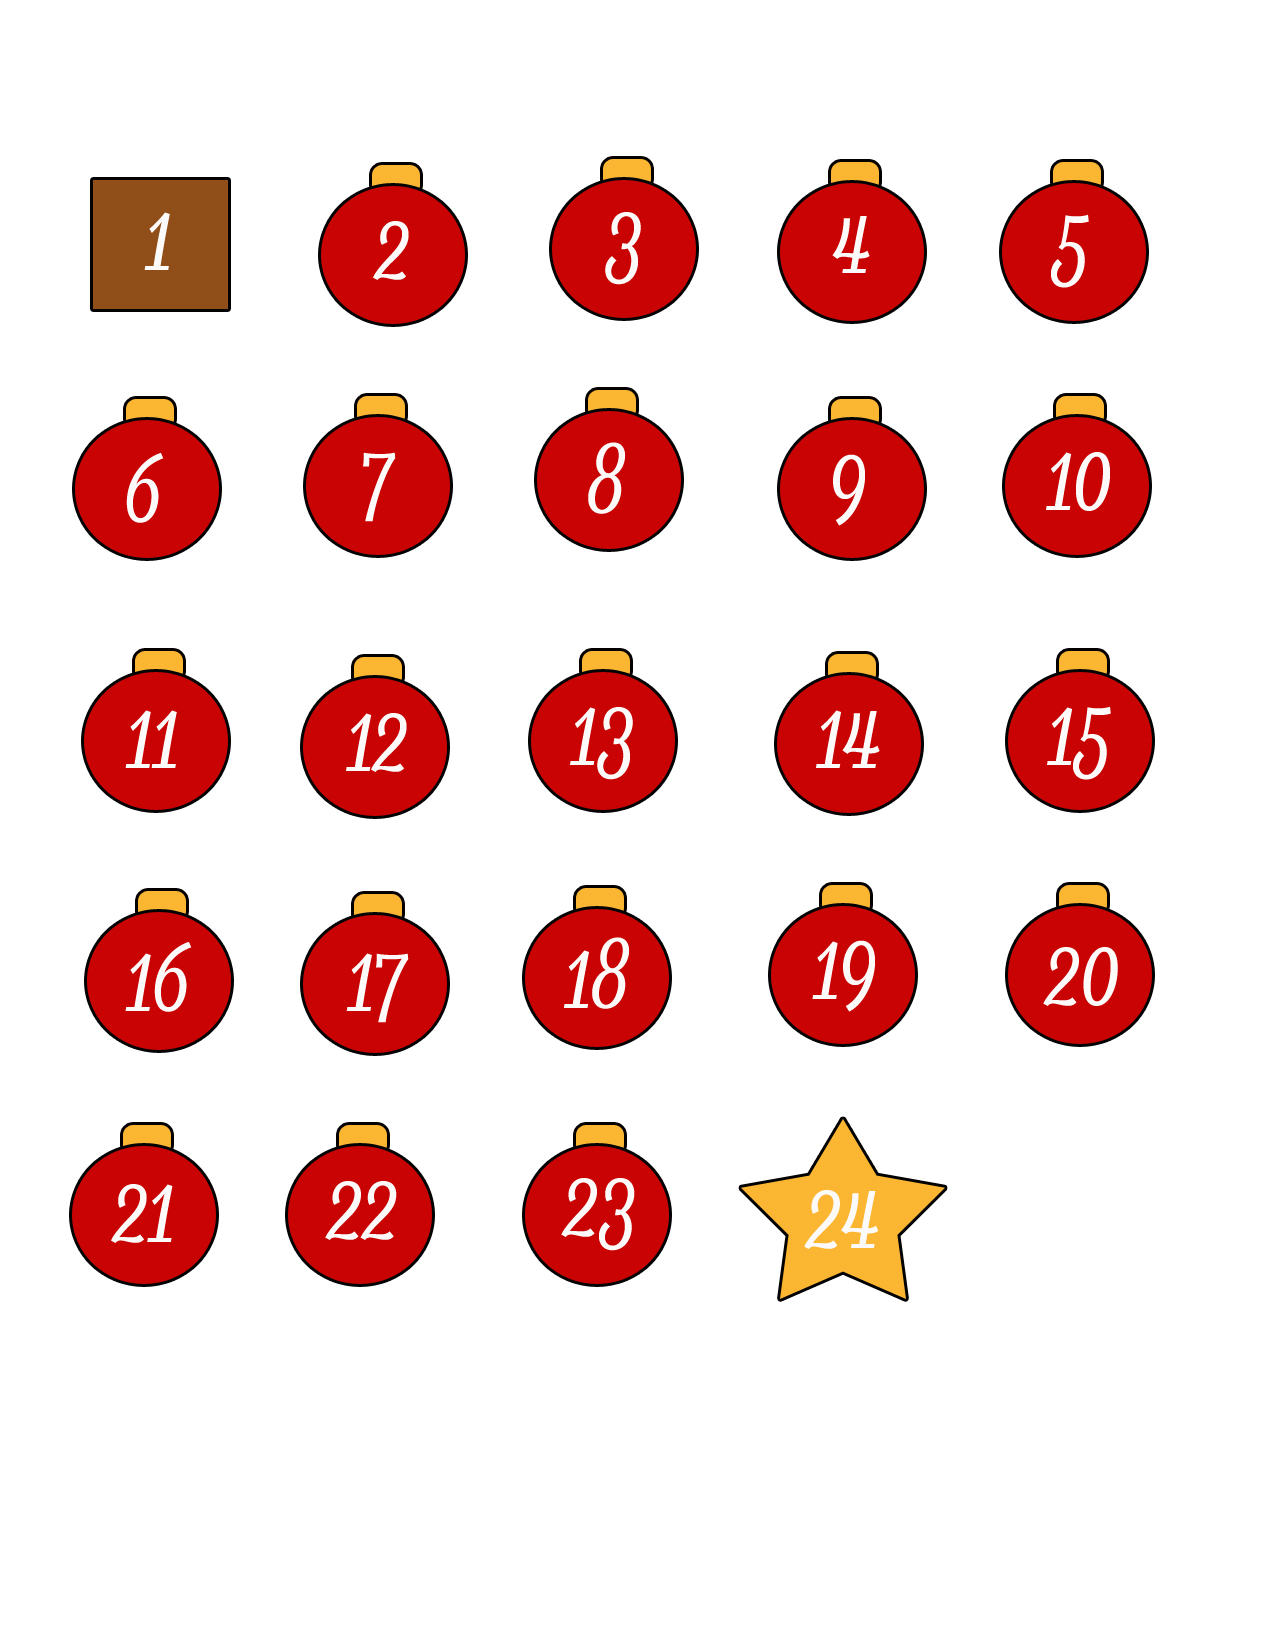
7. Print off the free printable advent calendar labels that’s linked below. There’s a star, a tree trunk, and the rest are ornaments. They are all labeled 1 through 24 to number each of your covered toilet paper rolls.
8. Cut around each label and glue them to each of the tissue paper covers. I put mine in order from the bottom up but you label yours in whatever order you’d like.

9. Then set your advent calendar in an area that your kids will see everyday. Starting on December 1st, they can poke their finger through that day’s tissue paper to reveal their advent calendar surprise. Each day they open one tube to count down the days until Christmas. Once they get to the 24th day, then they know that the next day is Christmas!!

We hope you loved this DIY Christmas Advent Calendar. If so, check out our DIY Christmas wrapping paper and other fun Christmas crafts below.
